
ESP-32 Camera
What did i use it for?
After configuring the 3D printer server with everything, I thought that a little more caution couldn’t hurt and it would be good to have an emergency solution in case the server “goes crazy” and becomes unavailable in the meantime.
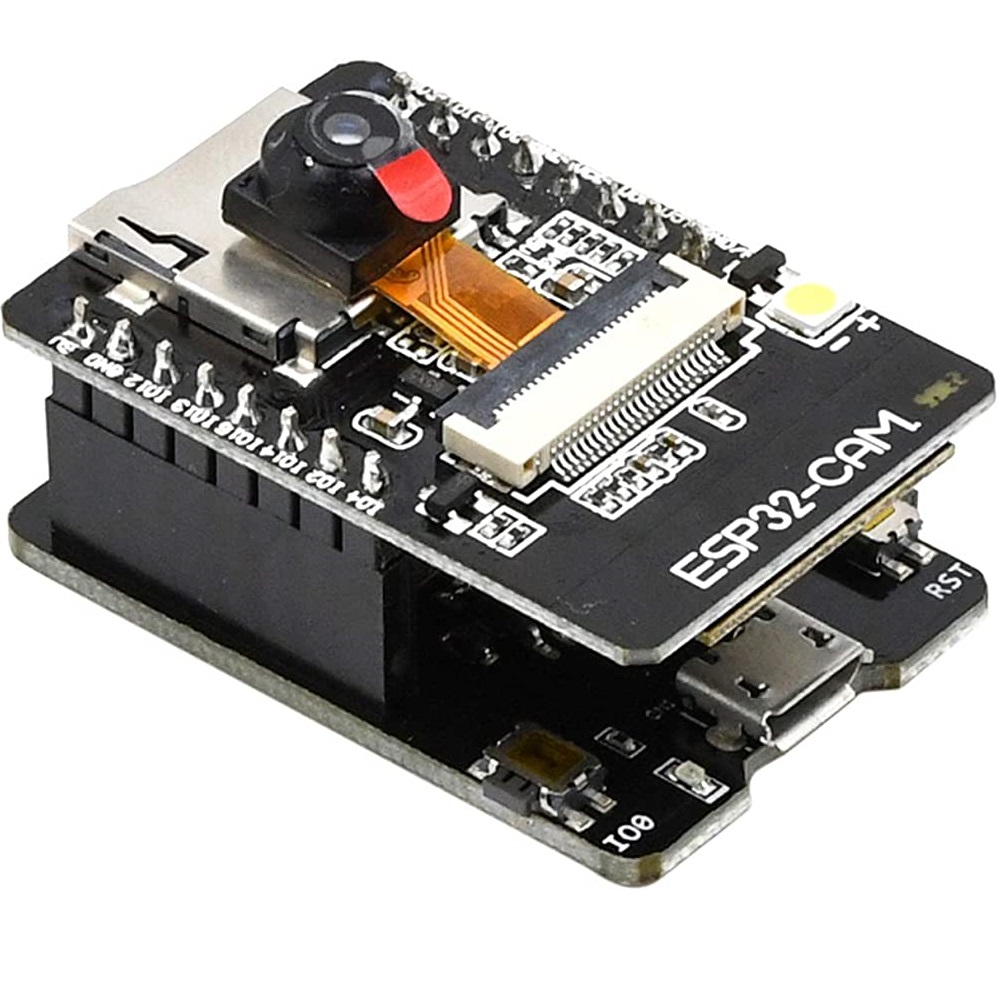
Fortunately, this never happened, but I bought a camera microcontroller called ESP32-CAM, programmed it to be able to upload the taken photos to the Firebase Cloud Storage, and created a small web application so I could control it via the Internet and see the most recent image of the camera in a comfortable layout.
During this project, I applied the instructions in the following tutorial:
https://randomnerdtutorials.com/esp32-cam-save-picture-firebase-storage/
Usage
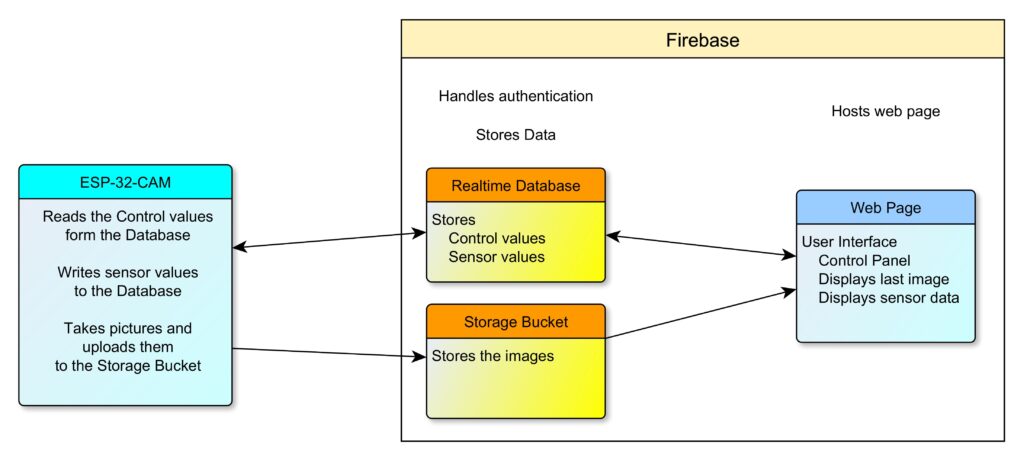
The user interface of the device is a website also hosted by firebase. The purpose of the website is to provide a Control panel for user inputs which are written in the Realtime Database. Then the microcontroller reads the values stored in the database and acts according to them.
The website also displays the most recently uploaded image and some state information and displays them in a clean layout.
It works like this:
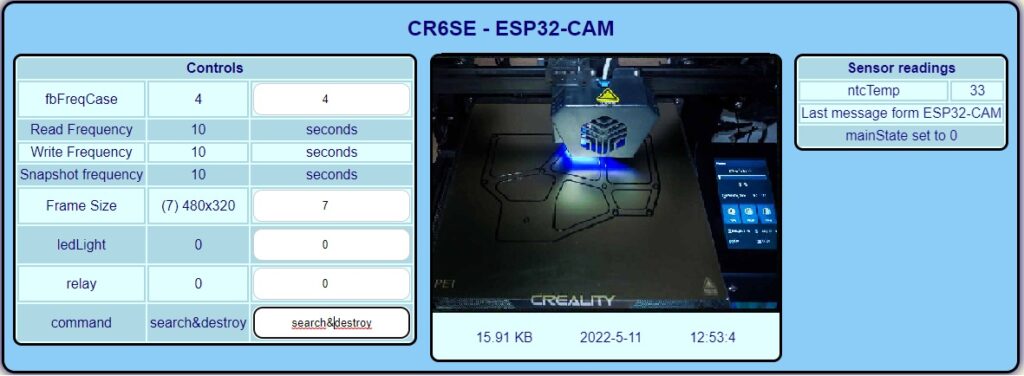
The left panel shows the control variables. They are written by the user and read by the microcontroller.
The fbFreqCase variable defines the read, write and photo frequency of the microcontroller. This is necessary because the monthly data transfer of the cloud storage space is limited, but there is no need taking a photo of the printing in every second anyway. This variable can be used to turn off photo taking, but in preparation for more critical moments a one second frequency can also be specified .
The Frame Size variable determines the resolution of the photo and thus the size of the image file. Each of the 14 options that can be set on the microcontroller can be selected on the website.
The ESP32-CAM module has its own flash: a bright white LED. Its brightness can be specified in % with the ledLight variable.
The relay is for switching the relay of the 3D printer.
And by the last field more complex commands can be entered.
The most recently uploaded image appears in the middle, the new image always overwrites the previous one, as we are interested in the current state.
The right panel is written by the microcontroller and read by the user.
Final words
In the end, I didn’t finish this project completely because it was never really needed and I ran out of motivation after a while, but I think it’s likely that I’ll come back to it in the future. The functions described above work, but I have not designed a casing for the controller, nor connected it to the relay.
I found that it takes several seconds to create and upload even a 640×480 image. The slowest part of the process is writing and reading back the SPIFF file system when uploading. The process of taking a photo and uploading it can probably be replaced by another, faster method.
Regardless of the limit of the upload speed, the 2 Mpx camera produces a picture of sufficient quality for the purpose and the device could fulfill its task as a safety emergency reserve.