with Microcontrollers, 3DPrinting, Lasercutting, Programming
Drawbots 1/3 My first robot
Why did I make it?
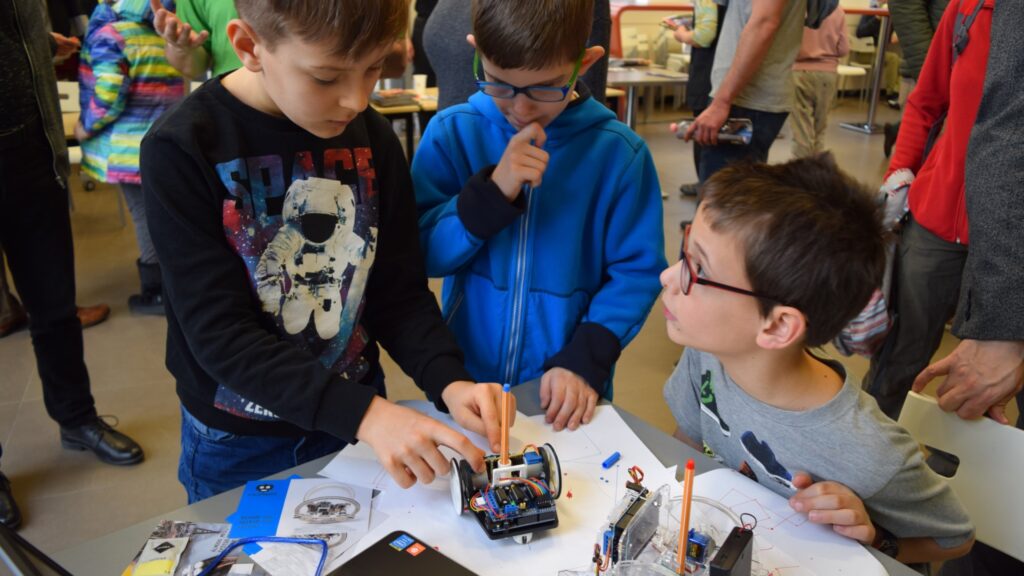
It all started when I joined a robot building association to motivate myself to create. At that time, the association was already holding weekend robot-building courses – usually for 10-12-year-olds – and I took on various preparatory, support and eventually development tasks to run the courses.
I made this robot so I could demonstrate the capabilities of the course robot at various events in an easily understandable way for laymen in a short time and interactively – all without actual programming.
What can the robot do?
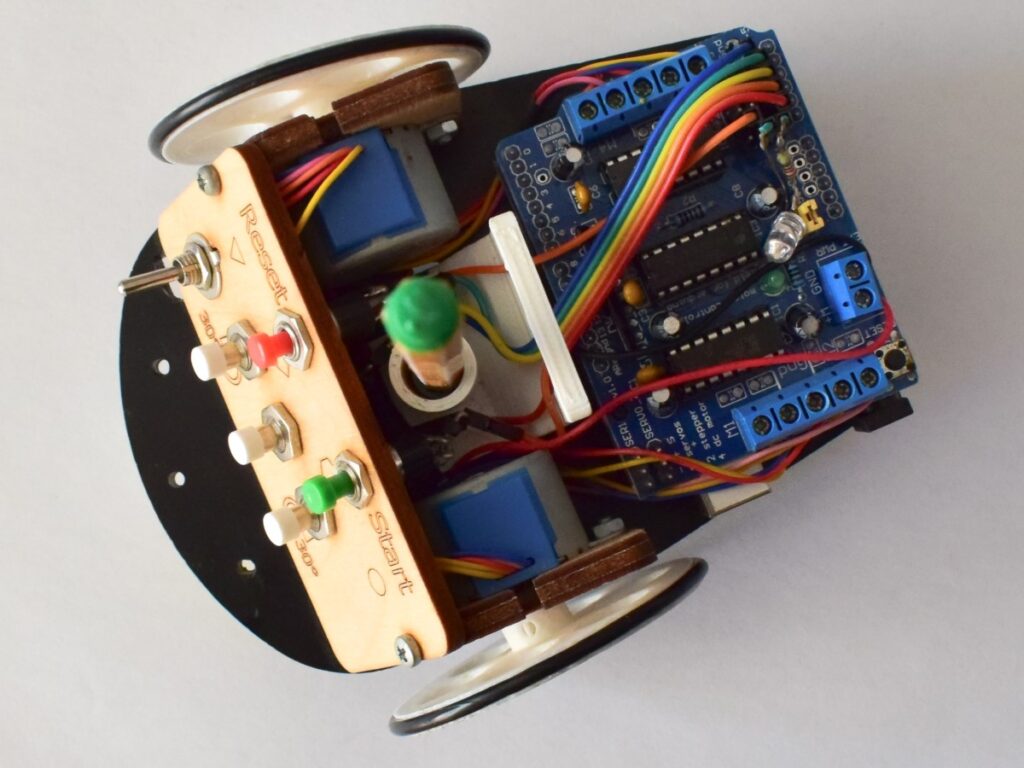
This robot is essentially a pen with motorized wheels, which can be given movement instructions with the help of push buttons – so it can be quasi-programmed – thus different geometric shapes can be drawn with it. No one will use the robot to put Picasso-like works on paper, but it is a great tool for performing playful tasks that develop spatial awareness and logical skills.
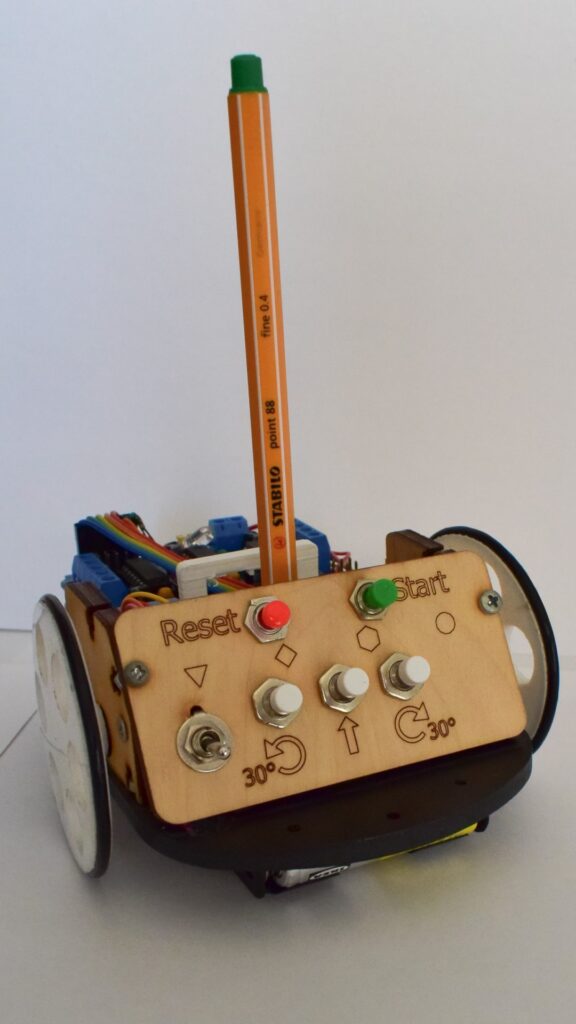
It has two operating states: Command and Execution. In the Command mode, the player specifies the sequence of steps to be performed by pressing the buttons. After pressing the START button, the robot executes the entered commands in sequence. On command forward it will draw a straight line, and on command right or left it will turn around the pen 30° without drawing. Once it has completed all the instructions, it will return to the Command mode. The entered command line can be deleted with the RESET button.
When the players have understood how to use it, I usually give them the following “programming” tasks:
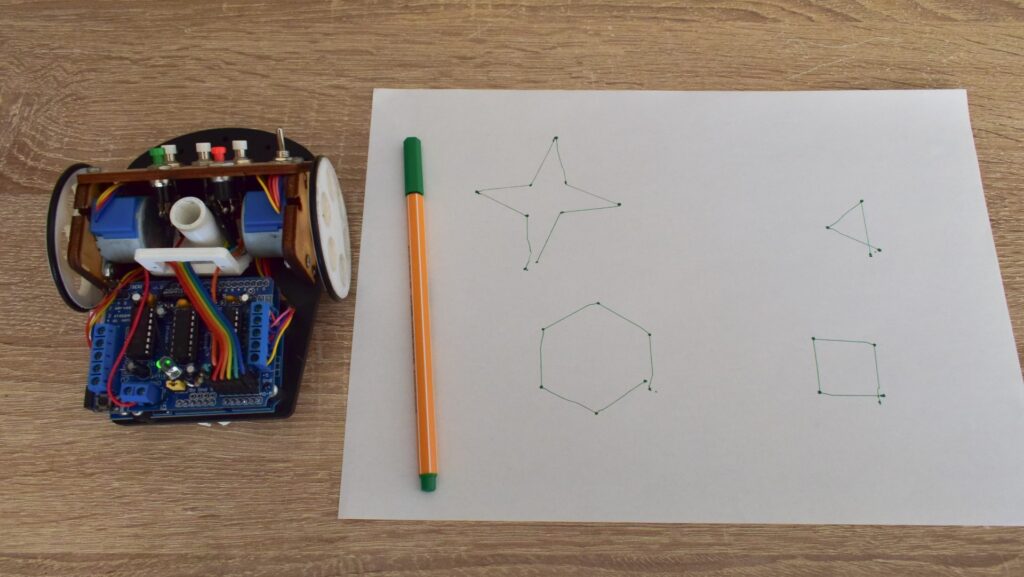
Draw a square with the robot!
After it is done, draw a hexagon!
After it is also done, draw a triangle!
Children are always very proud of their solved tasks. For the smaller ones, I also have to explain what it means that the robot turns 30° at a time and how many degrees is a right angle. Thinking of the more timid ones, or those who cannot wait for many explanations: I also equipped the robot with cheat codes: If you press START after pressing the RESET button 4 times, the robot starts drawing a square. If you press START after 6 RESETs, the result will be a hexagon, 3 RESETs will make a triangle. You can also use it to draw an Orion star, which can be called up by pressing 5 RESETs.
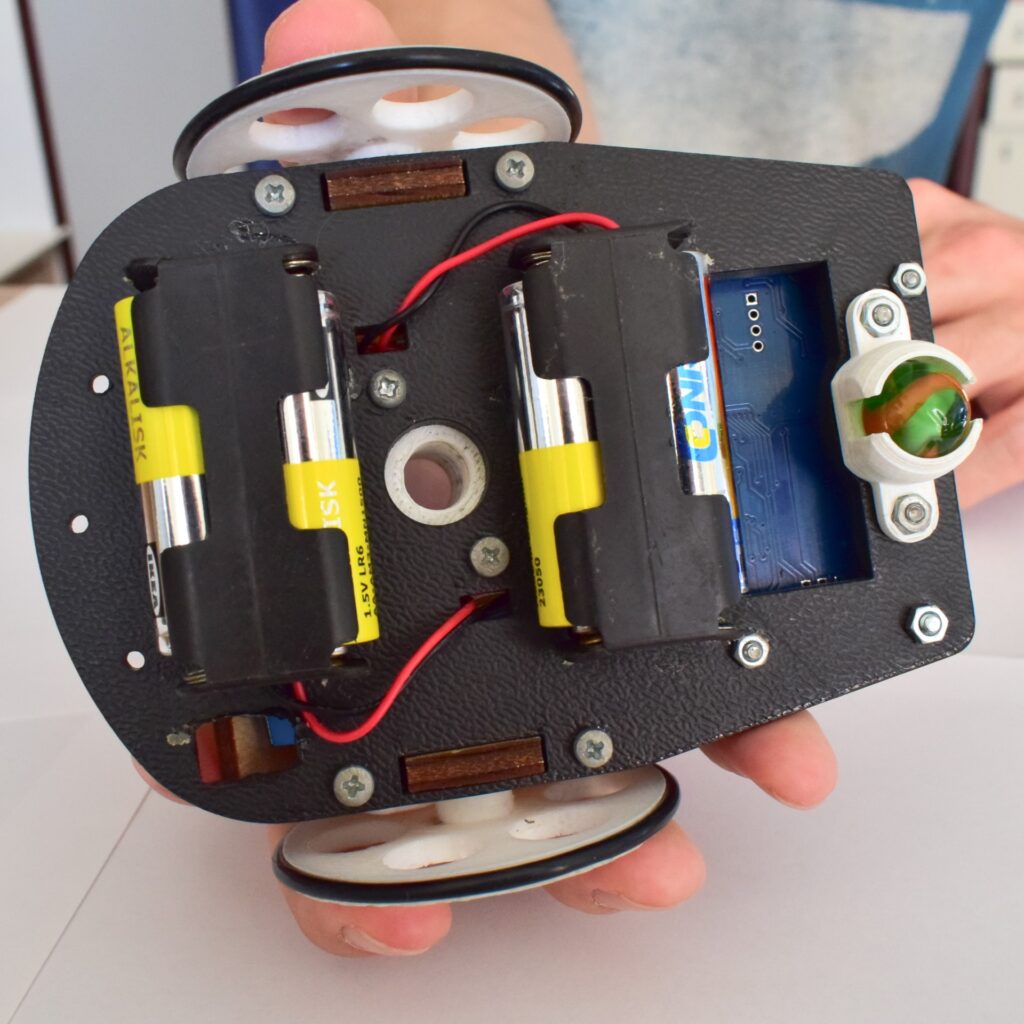
Structural overview
The robot’s frame is built from laser-cut and 3D-printed parts. Its wheels are turned by stepper motors, the control is implemented by an Arduino UNO and an Adafruit Motor Shield. The adhesion of the two wheels is helped by O-rings, and a third caster wheel is also involved in the support, which is a glass marble. The line of the pen goes through the axle line of the wheels, so when the wheels rotate in opposite directions, the robot can turn around the pen without the pen drawing a line.
Final words
Although the robot could have more possibilities than this push-button control allows, it stood its ground as a promotional tool. However, after many uses, its shortcomings became apparent. After a year, recognizing these problems I redesigned the robot, which I present in this article.