with Microcontrollers, 3DPrinting, Lasercutting, Programming
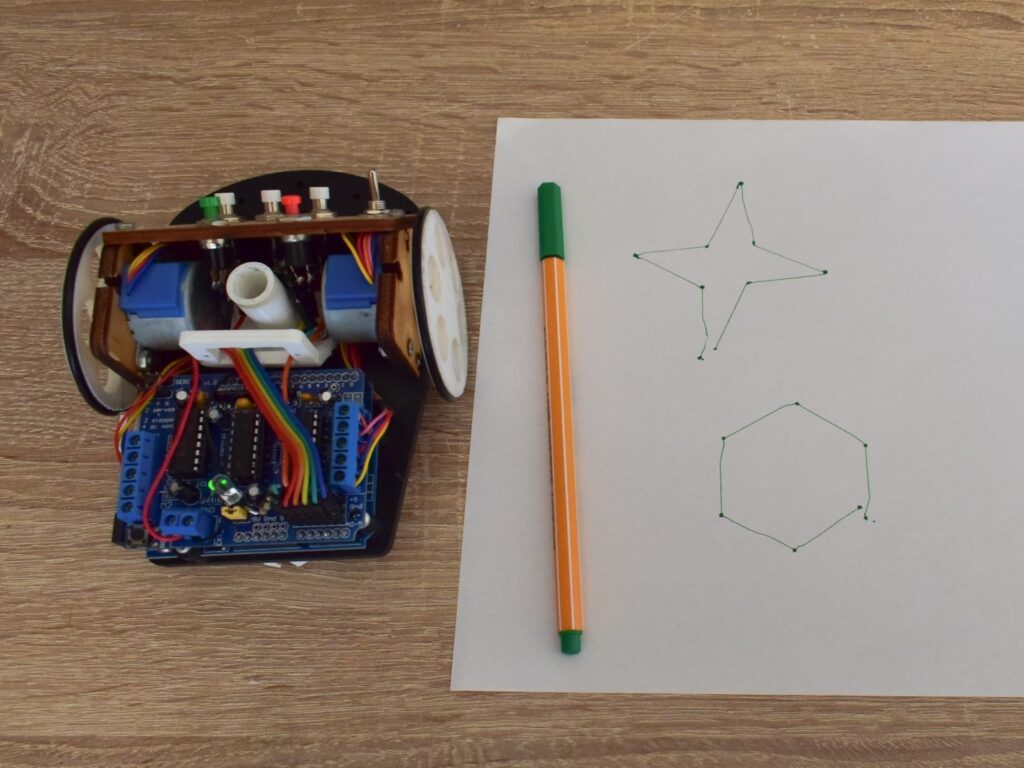
Drawbots 2/3 My second Drawbot
About a year after my first robot, I decided to create a newer, easier-to-use version of the drawing robot, with new functions added.
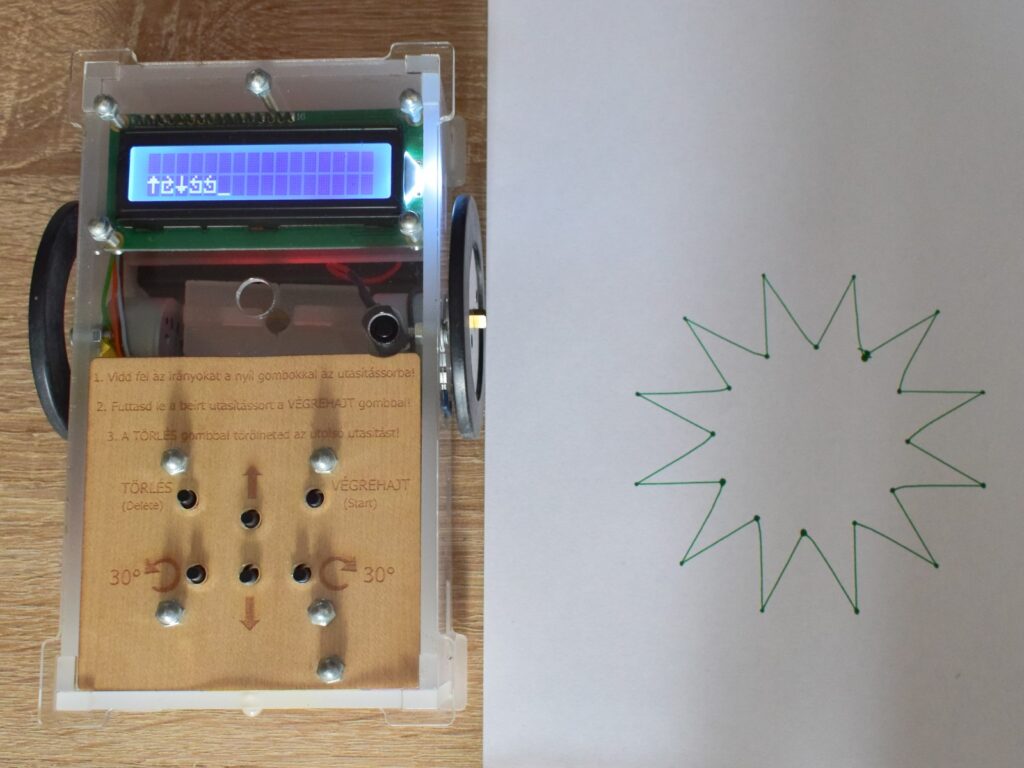
The new functions compared to the previous one
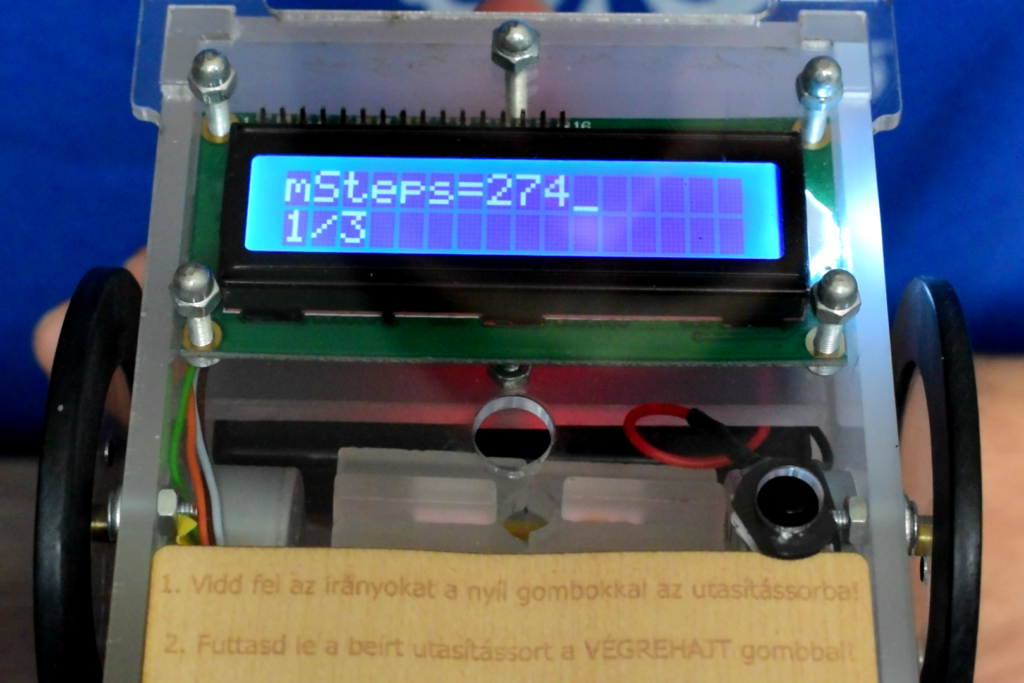
It has a screen on which you can review the entered instructions.
The delete button deletes only the last statement, not the entire program.
It can also go backwards – which is useful for drawing a saw line, for example.
By pressing the START button several times, the entered instruction line is executed several times in a row.
What do these new features really mean?
In addition to the fact that the player (and the people standing next to the player) can see the instructions typed in so far, the player can undo – correct the entered commands, just like in a text editor.
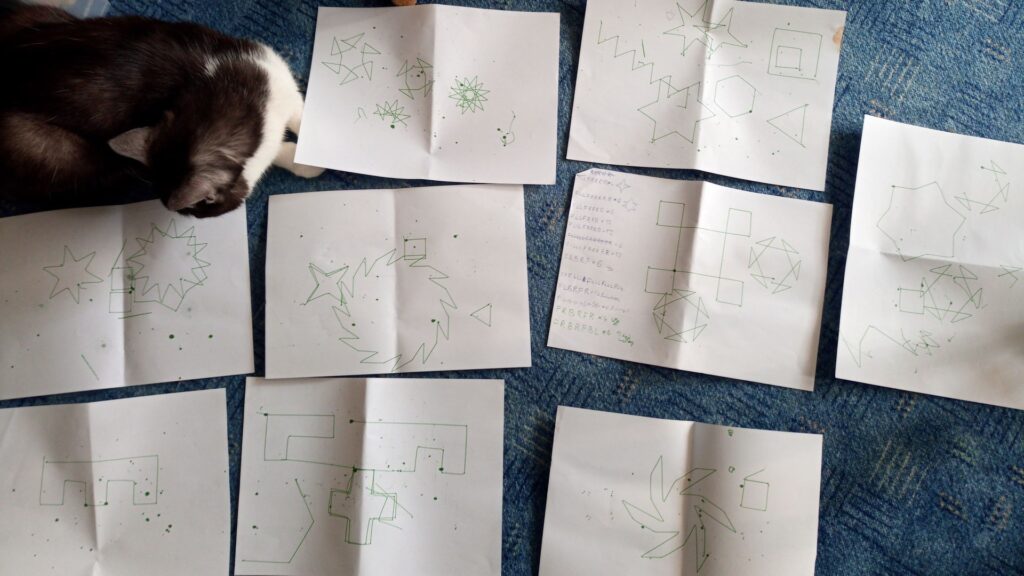
Since the entered instruction line can be multiplied, the previously described drawing tasks – square, hexagon, triangle – can be implemented with significantly fewer instructions. It is also possible to create more complex drawings that contain cyclical repeating details.
Further technical innovations compared to the previous one
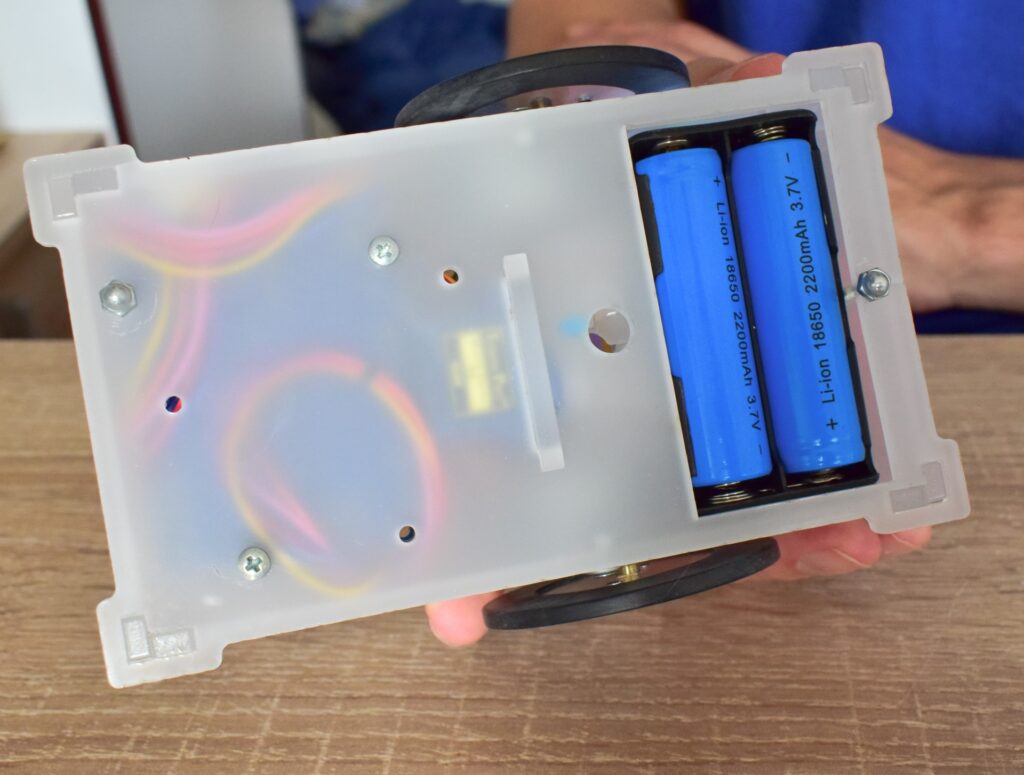
Rechargeable 18650 type battery instead of AA battery.
More durable housing – the electronics are completely enclosed.
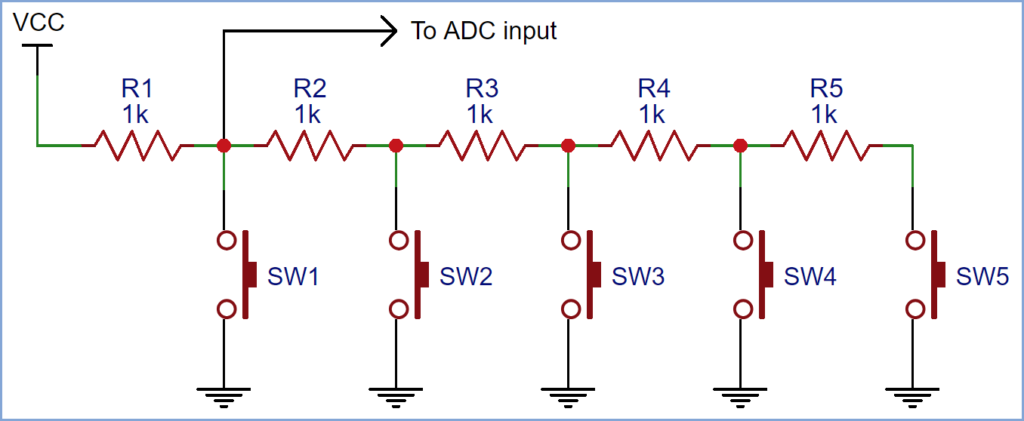
All push buttons are connected to a single input pin – with the help of a resistance ladder- so that several peripherals can be connected to the Arduino. (This version of the Adafruit Motorshield occupies most of the Arduino UNO’s connector pins, leaving only the analog pins and pin 2 free.) The resistance ladder pin saving was also essential for using the LCD display.
Battery voltage monitoring: One analog input (through a voltage divider) monitors the battery voltage level. If the voltage falls below a certain level, the indicator LED lights up, so the battery can be replaced before the low charge could cause errors in the operation.
Config menu: There are a couple of settings which can be called up with a secret push button combination. While in this config mode, the values are shown on the display and can be changed using the push buttons. These values are stored in the non-volatile EEPROM memory. In this way, the number of stepper motor steps required for a 30° turn, or the measured voltage value below which the battery replacement indicator LED turns on can be fine-tuned without reprogramming.
An interesting fact: the rubber coverings on the robot’s wheels are made from a bicycle tire hose.
Final words
If you’re interested in this instruction giving “programming” concept, I’d be happy to recommend two games based on a similar idea:
The other one is Logo Interpreter, which is a kind of a drawing-programming environment and you can use it to make all the drawings I have presented on the pictures above. https://www.calormen.com/jslogo/#